Fastest CDN configuration, Stackpath + Cloudflare + WP fastest cache 💥
We go here for the fastest possible combination to offer your pages to your visitors at lightning speed, using Stackpath (CDN) + (Cloudflare CDN2) + WP fastest cache (plug-in). The WP fastest cache is a Wordpress plug-in that is prepared for collaboration with these two top CDN networks. Perfect for our job.
Advertisement
Both Cloudflare and Stackpath do much more than just store your content on servers worldwide. They also provide security and cache and many more optimization components. The WP fastest cache plug-in is at its best with the paid version, but here we can simply get started with the free version. The choice is yours, if you have $ 49, it's not a bad idea to have the PRO version.
We assume that you already have a running Wordpress website and want to make it super fast. If you don't have a website yet, read first: Creating a website with Wordpress and Divi Theme.
We start by installing WP fastest cache in your Wordpress...
Install WP fastest Cache (free plan)
WP fastest Cache is one of the fastest Wordpress plug-ins for cache and especially when we talk about the paid version. WP fastest Cache has built-in special settings for Cloudflare and Stackpath and is perfect for making both of these work for you at the same time. Another very good cache plugin is for example W3 Total Cache but it has many different settings.
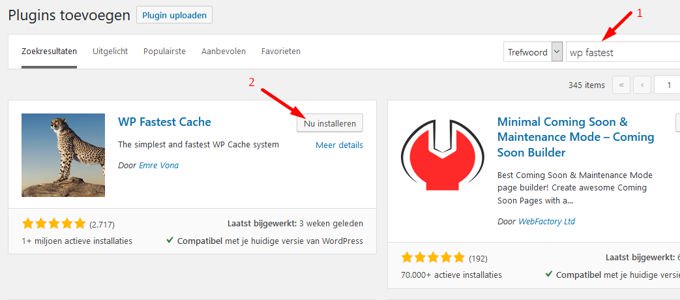
To start, install the plugin via your Wordpress backend in "Plug-ins" >> "New plug-in" as shown below and activate the plugin immediately.
For CDN use the settings below in WP fastest Cache. Disable Auto Minify and Rocket Loader on the "speed" tab of your Cloudflare settings (SG Railgun must be enabled). This is what the WP Fastest Cache plug-in developer recommends in its Cloudflare tutorial.
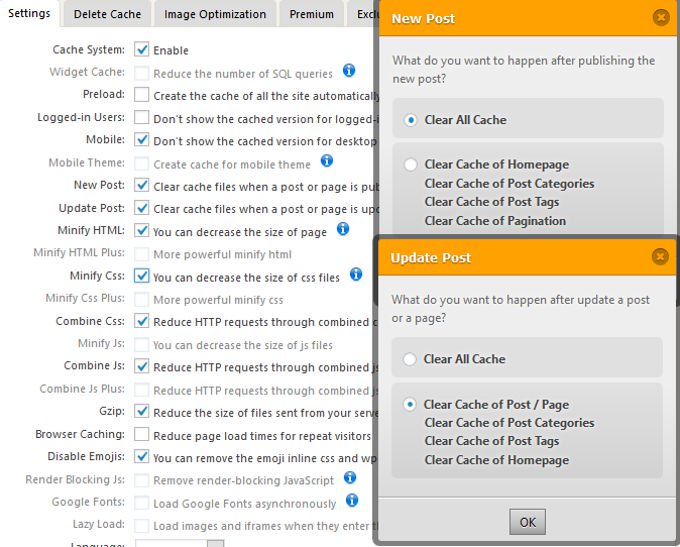
Use the settings below for WP fastest Cache (setting with CDN).
Delete cache
This tab speaks for itself, you can delete cache and minified here if you have made changes to your website that are not shown in your browser.
Image optimization
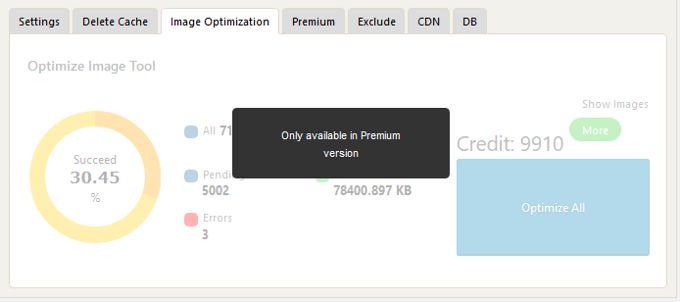
Image optimization is very important. It is not in the standard version so whether you have to do this manually or with another plug-in (the best one is Imagify) or you buy the Premium version of WP fastest Cache. Both CDN networks optimize your images (virtual) but it is better to optimize the physical images on your own server.
Premium
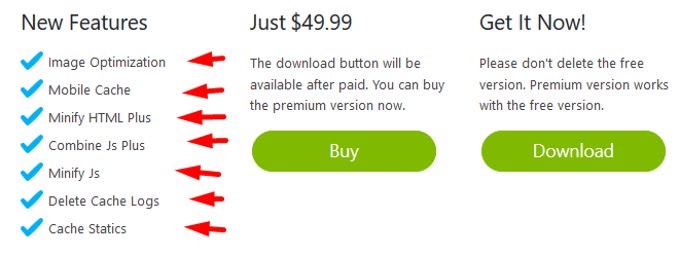
The premium version of WP fastest cache gives a lot of extra options that make your website even faster.
Exclude
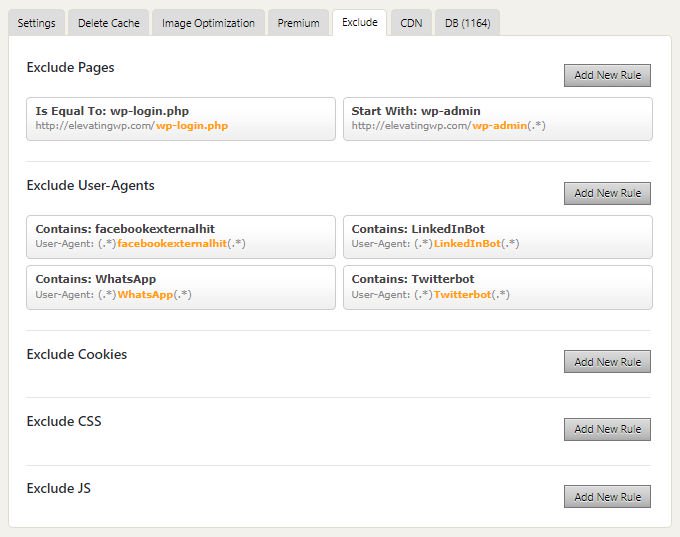
You can specify pages here that should not be cached such as check out pages or pages where errors occur. Your complete back-end could also be used here.
CDN
A CDN (content delivery network) makes your site faster by hosting it on multiple servers throughout the country and the world, as opposed to 1 origin server (it reduces the geographic distance that your content needs to reach your visitors) . We will start by setting the CDN networks, firstly Stackpath.
DB
If you do not have the full version, you can use WP-optimize optimize your database.
Set stackpath CDN
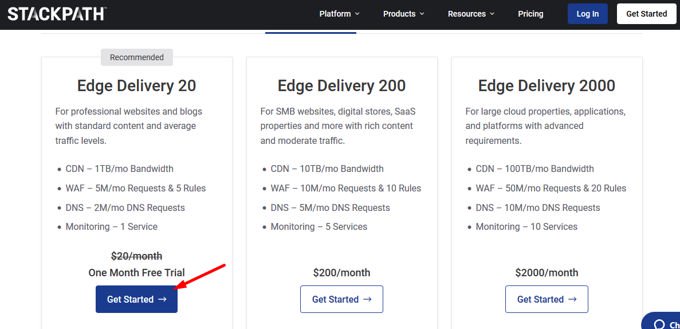
Go to the site of Stackpath (click), and choose the cheapest plan. You can test this for free for a month, after that it costs $ 20 a month which is not much for the services you get.
Is Cloudflare alone not enough?
Maybe, but it could be better and hence this article. Only Stackpath is also not optimal and without CDN also goes. The question is how much you love your website ... We go here for the optimal settings for anti-social loading times. Stackpath uses super fast pure SSD servers with 10 GB uplink connections, a lot faster than Cloudflare. But Cloudflare has more data center (193) than Stackpath (45) and should certainly not be missing for the optimal settings. StackPath costs you nothing extra for HTTPS traffic, Cloudflare costs per use. StackPath also displays extensive panels that provide a lot of data about your cached files. Both networks can protect your account using a two-step confirmation procedure and you can whitelist the IP locations of people who access your account.
Stackpath: Our global 65Tbps network features advanced architecture, custom hardware, redundant Tier 1 carrier connections and full stack deployment at any location to create a platform that is safer, faster and much more flexible.
In the next screen enter your email address and password and click "Create account". We don't make a screenshot of this as simple as that.
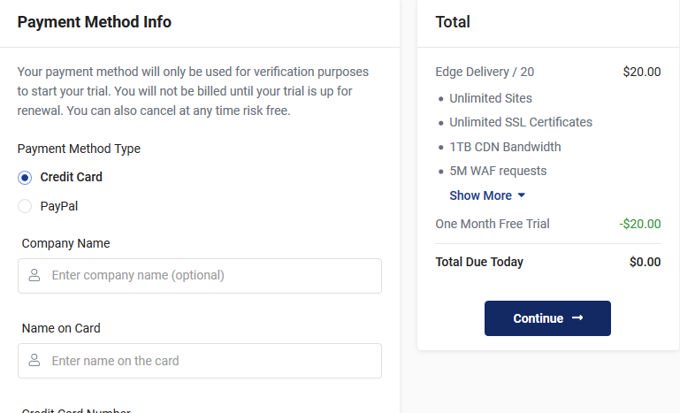
Next screen: Enter your CC data or click through Paypal, you will not be billed for the first month and can cancel at any time, if you wish.
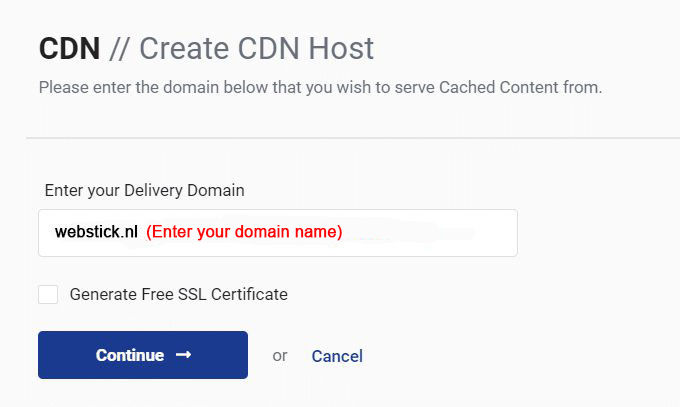
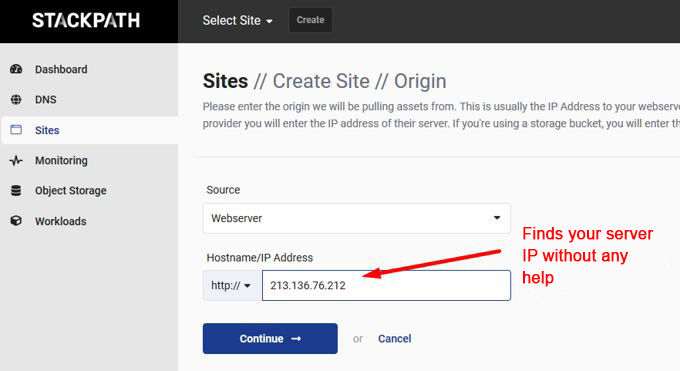
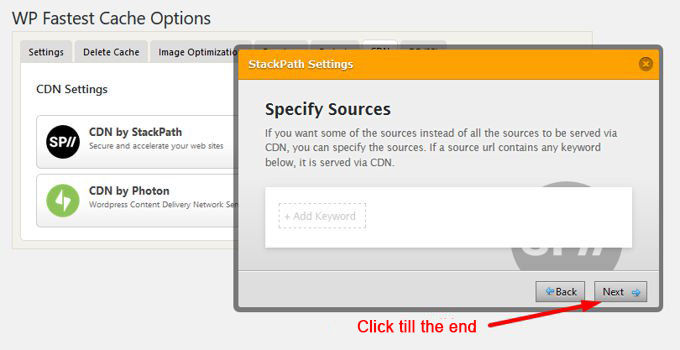
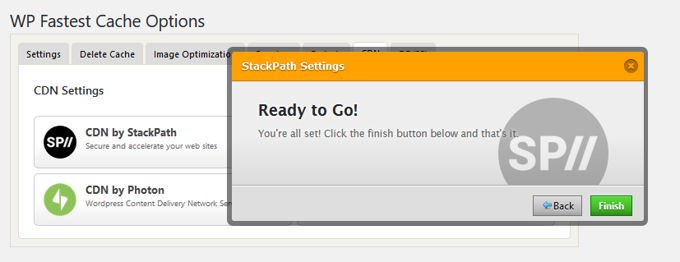
Log in to your account at Stackpath. In the left column click on "CDN". Follow the instructions on the images below.
You specify your domain of your site and Stackpath automatically finds the IP
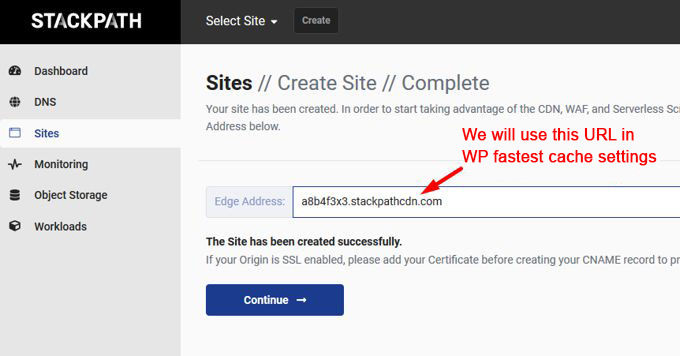
Stackpath now generates a URL that you will use in the settings of WP fastestcache. We explain this further below.
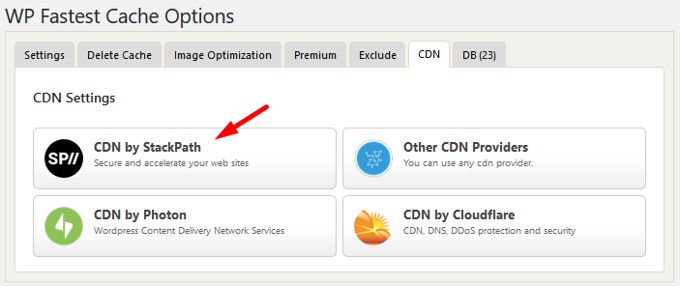
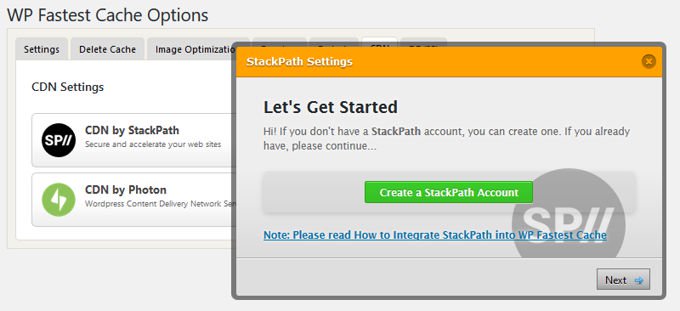
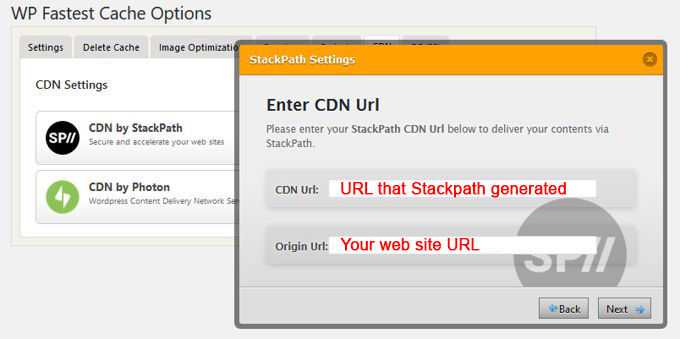
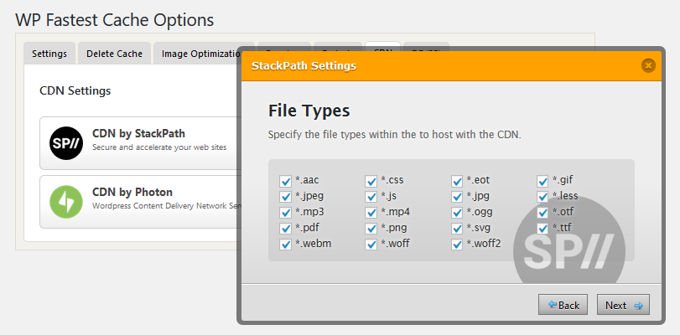
Set WP fastest cache for Stackpath
Set Cloudflare CDN
To start with, you need an account with Cloudflair and you need to know how to integrate your website. Click on the button below if you don't know how to do this yet.
Set WP fastest cache for Cloudflare
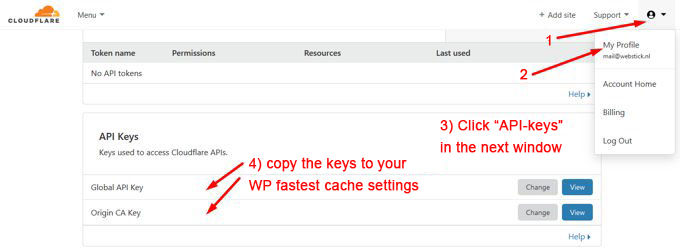
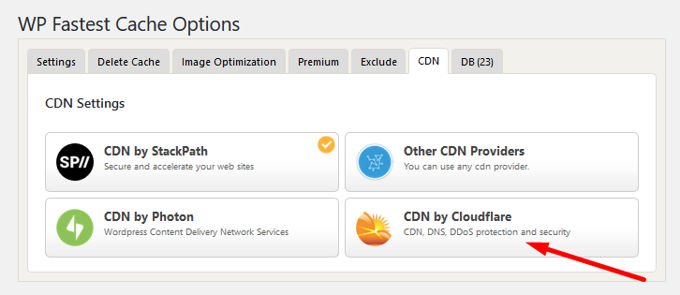
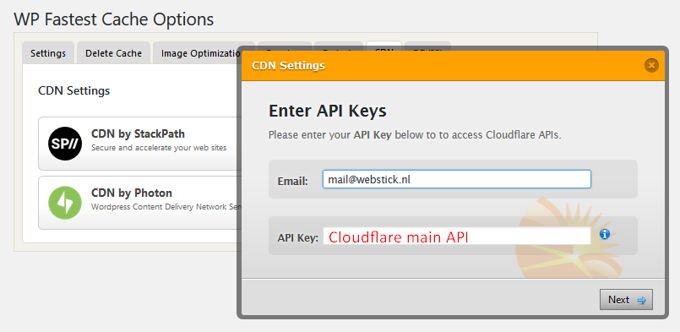
If you continue, WP Fastest Cache will now disable your minify settings (since Cloudflare now takes over). They will also stop the Rocket Loader to make things compatible (your site won't be bothered by this) and set the browser cache to 24 days. We do not show screenshots of this (too simple). The installation in WP Fastest Cache is now ready.
Set Cloudflare (free plan)
Don't let mail traffic run over Cloudflare
Cloudflare picks up all DNS settings of the server on which the website is located. A record is also created for "mail". Turn this off because otherwise your mail will no longer arrive and you will no longer be able to send mail via mail clients such as Outlook or Thunderbird. The orange color in the cloud to the right of the record changes to gray when you click on it, that's all you have to do. The image below is a screenshot of:

Website compression
You disable Minifying, this is important and on the recommendation of our plug-in. (WP fastest cache already did this yourself but you check if everything is OK) To get here, click on the blue "Speed" button in the Cloudflare top menu.

In the "Speed" chapter in Cloudflare turn off Rocket loader as shown below. (WP fastest cache did this already but check it)

Optimize images
In the image below you can see that this requires an upgrade to "Business", this costs 200 dollars a month and is absurd. Turn on "Polish" in Cloudflare for image optimization.

Cloudflare also optimizes your images, set "Polish" (Speed chapter) to "Lossy" as shown below.

Brotli
Accelerate page load times for your visitor's HTTPS traffic by applying Brotli compression.

Development mode

If you are going to work on your site it is advisable to temporarily switch this mode on in Cloudflare under the chapter "Caching" as shown below, otherwise changes will not be shown immediately. With regard to a free Cloudflare account, I have discussed the most important issues. The rest of the options speak for themselves.
Services that are paid separately
Argo costs you $ 5 a month. Argo is a service that uses optimized routes in the Cloudflare network to deliver answers to your users faster, reliably and securely. Enabling Argo activates Argo Smart Routing and Tiered Caching, reducing the latency of the internet by an average of 35% and the connection errors by 27%. This is definitely worth the $ 5 p/m. I would not use the Argo tunnel.

Load Balancing: Protect against service interruptions through load balancing, automatic failover, geographic routing and active health checks with your original servers. This service also costs $ 5, but I would prefer not to do this, especially if you have faith in your own server where the site is on.
Set Cloudflare (Pro plan)
The Pro plan also has all the options that a free account has. The same applies to everything, but the Pro plan has much more and in my opinion it is certainly worth paying $ 20 a month for this. It will make your site top fast, I care less about the security options.
What do you get for $20 p/m?
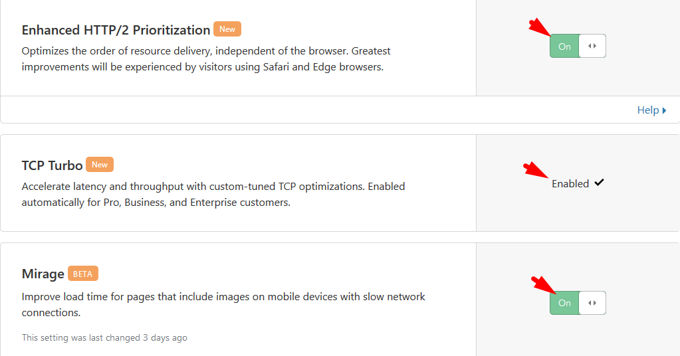
In the "Speed" section, you enable the following new options: "Enhanced HTTP/2 prioritization" optimizes the order of source delivery, independent of the browser. "TCP Turbo" speeds latency and throughput with customized TCP optimizations. "Mirage" improves the loading time for pages with images on mobile devices with slow network connections. Further new options are less interesting, but these 3 ensure such a faster loading time that it is worth taking a Pro Plan if speed is important for your site.
Slot
For those who are still in this article at this point... "great job, you've neatly set up your double CDN and Cache Plug-in and worked your way through the complete set up!". Have fun with your super-fast Wordpress website.
Advertisement

