Increase WordPress Max Upload Size [2026] 💥

WordPress limits your upload size to prevent you from uploading large files and plugins. This can prove to be a significant problem if you are building a media-heavy site. In such cases, it is necessary to increase Wordpress Max upload size. There are several ways to solve this problem, depending on the hosting provider and server. I will show you how to quickly increase your maximum upload size in Wordpress.
Advertisement
First check current maximum upload size
You can check the maximum file size of your website by going to your WordPress dashboard and then clicking on Media > Library. To activate the media uploader, click the "Add New" button. Just like in the screenshot below you will see your max upload filesize.

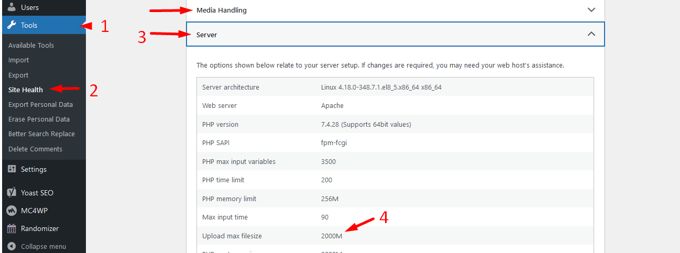
The current WordPress Max Upload Size for your website can also be found in "Tools" >> "Site Health" in the "Media Handling" and the "Server" tab. See screenshot below.
1. Bypass server limits with this WP-plugin
This method works for everyone, no matter what type of hosting you have. We are going to install a Wordpress plugin in your site. The Big File Uploads plugin bypasses server limits for Max Upload Size. Normally if the size you set there is higher then the Max Upload Size the server allows then these WP settings will just be ignored, but not with this plugin. It really does its job and gets only 5-star ratings! The secret is it uploads your files in many smaller pieces.
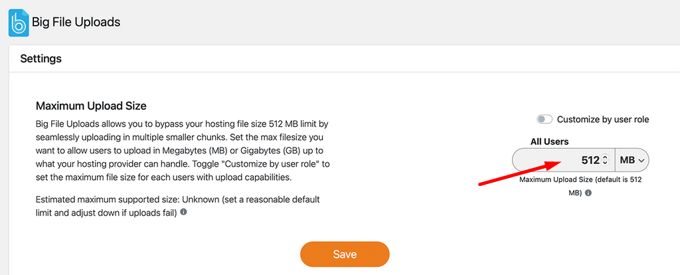
Download the file and upload it via your backend or search for the plugin in "Plugins" >> "Add new". Install and activate it. Its settings are really easy and you can even use different Max Upload Sizes by user role.
2a. Edit WP Max Upload Size in WHM (Tweak)
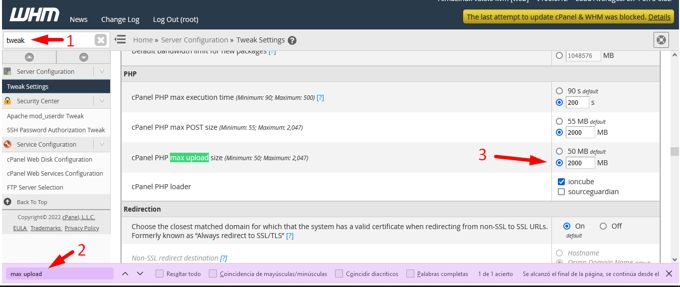
If you have a VPS, VDS or dedicated server the cleanest way to do increase the Max is on the server itself. Therefore let's just go straight to the server settings, it is the most direct way to edit the Max Upload Size. We call it often Cpanel but when you have the control over a server the name is in fact WHM. Log in on your WHM panel and go to "Tweak Settings". Use the search in the upper left corner to find it quickly, then use CTRL+F and search for "max upload". It is good practice to keep max post size and max upload size equal.
2b. Edit WP Max Upload Size in WHM (PHP INI)
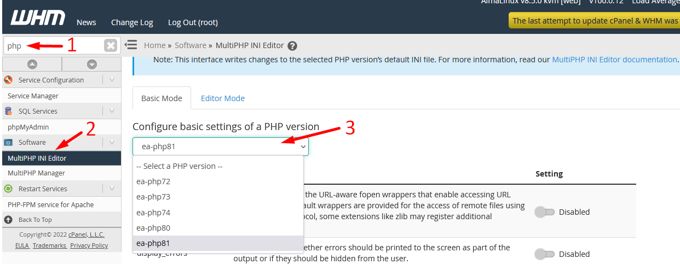
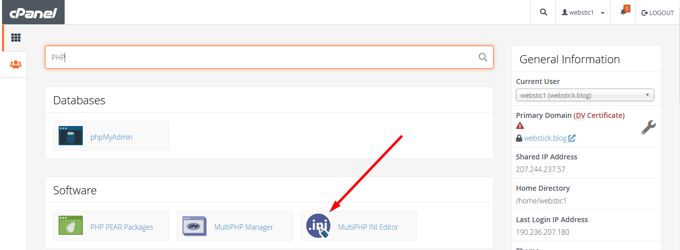
There are 2 ways to increase Max Upload File Size, here is the second one. Use the search, search for "php", click on "MultiPHP INI Editor". Increasing File Size for Uploads has be be done for all PHP-versions available. Choose them one by one, and edit your Max Size. See screenshots below.

3. Edit WP Max Upload Size in Cpanel
If you have a shared hosting with Cpanel control then log in to your panel. Use the search, search for "php", click on "MultiPHP INI Editor". Choose "Home Directory". Use CTRL+F, search for "max upload", edit the size. See screenshots below. It is good practice to keep max post size and max upload size equal.

4. Increase WP Max Upload Size using .htaccess
To increase WordPress' maximum upload size, your Apache webserver can be updated using the .htaccess file. Your .htaccess file can be found in the root directory of your hosting (public_html). Add the following code to the content of the file and save. Values can be edit as you please, just take care post_max_size is bigger or equal to the upload_max_size. If you can't find the .htaccess-file in your root directory, that means sensitive files are hidden. Change this in the settings and you will be able to spot .htaccess. See screenshots below the code for more clarity.
php_value upload_max_filesize 128M
php_value post_max_size 128M
php_value memory_limit 256M
php_value max_execution_time 300
php_value max_input_time 300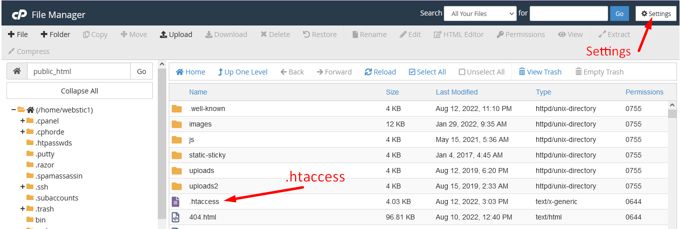
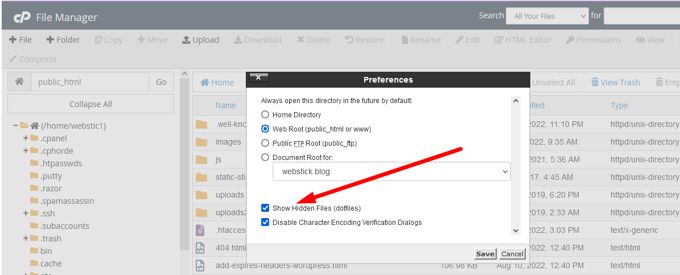
By the way, the root of your hosting can always be found using FTP or any other hosting panel using the "File Manager".
5. Increase WP Max Upload Size using php.ini
You can make changes to your default PHP settings in the php.ini file. It usually contains directives to define file timeouts and maximum upload size. You can locate the php.ini file by using FTP or SSH in your WordPress root directory. You may not find it in all cases. You can create a new file of the same name within your site's root directory if there is none yet.
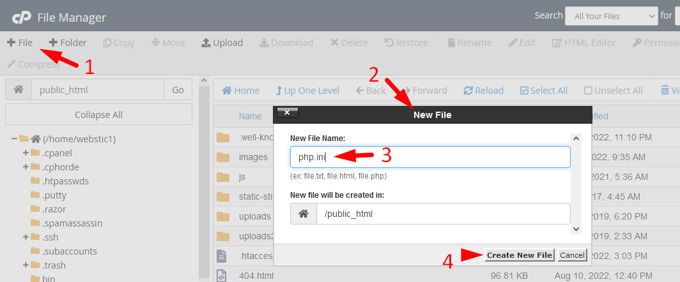
Above screenshot is take form Cpanel. But the root of your hosting can always be found using FTP or any other hosting panel using the "File Manager" if you have no Cpanel.
The following code should be added to the php.ini file after you have found or created it.
upload_max_filesize = 128M
post_max_size = 128M
memory_limit = 256M
6. Increase WP Max Upload Size using user.ini
Your hosting provider may have locked down global PHP settings and configured the server to use .user.ini instead of php.ini files. You can locate the.user.ini file in your site's root directory, just like php.ini. If it isn't there, you can create a new file at the same place. To create a new PHP.ini file, follow the same steps as explained in chapter 5 for PHP.ini.
The following code should be added to the user.ini file after you have created it.
upload_max_filesize = 128M
post_max_size = 128M
memory_limit = 256M
Maybe you will find other tutorials with more methods in there. Those methods will not be the best or are old and not v anymore if you know what I mean. This is a brand new article and the best ways are listed here.
Advertisement
