Moving/Migrating a Wordpress website manually or via backup or with plug-in? 💥
For years, the way to move a website between domains was by hand. In recent years, very good Wordpress plug-ins have come on the market that take over the heavy work. Both methods are being discussed here.
Advertisement
1. Move Wordpress website with the help of a plug-in.
The easiest way is to have a plug-in do the work, so we start with this. Normally there are no complications, these plug-ins are great today, we can say.
I show here the first 4 plug-ins that come up when searching for "all in one migration". The plug-in that I think is best, and have experience with, is marked with an arrow with number 2 and I have the professional add-on that ensures that there is no limit in the size of the websites one can download. You download the add-on here for free.
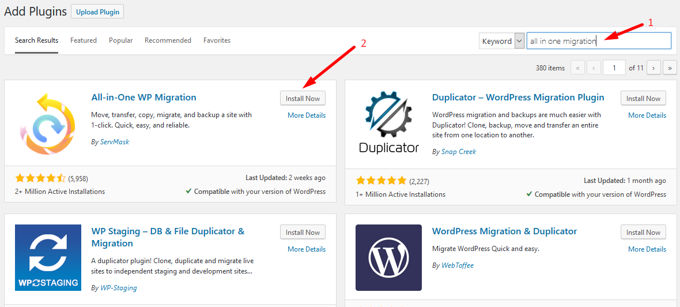
There are at least 8 different, the number of stars and how often they are used, it can be deduced that they all do their job well.
Export Wordpress
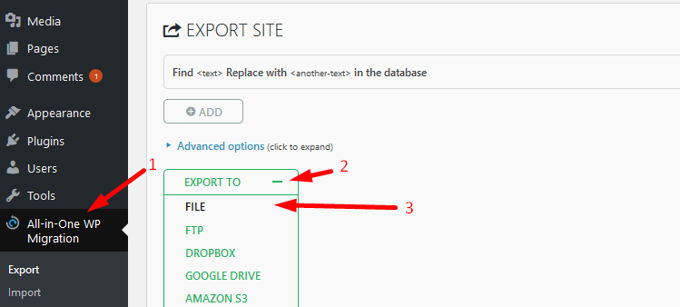
Install and activate the plug-in and do the same with the add-on that I offer you above. Below I show you in image format what you need to do to get the special backup that the plug-in makes to your computer. The plug-in searches everything together, the files, databases, etcetera.
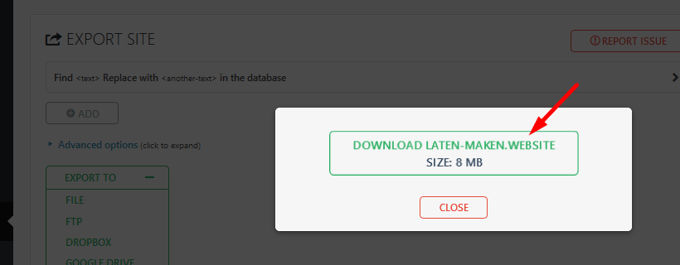
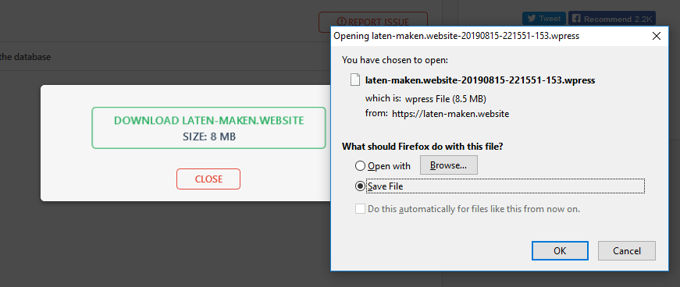
At this moment you are downloading the backup. Depending on the size of your website and download speed, this can take some time. You do not have to babysit it, the process is fully automatic. Leave the window open and do something else or continue working with other things in another tab or window of your browser.
Upload the website to the new domain
To start, install Wordpress on the new domain. Use simple data such as password 1234 because everything will be overwritten with the data from the website that we are moving, so it makes little difference to use difficult passwords, etc. Then install the plug-in plus the add-on that you can download above. For smaller websites the add-on is not needed.
Import Wordpress
First of all, in between: The unlimited extension does not mean that the upload can be refused if the max. Upload filesize on the server where your website is located is exceeded. If you get this error, install Increase Maximum Upload File Size and adjust the max above the size of the file that you will upload.
Just like with the export earlier you go to the plug-in but this time we choose "import" as shown below.

Now choose the special back-up file that you downloaded earlier and click on "open". The upload will begin. This process should not be interrupted so do NOT close the window. The upload will take much longer than the download depending on your internet upload speed, go and do something else while the upload is in progress. When you come back and see that the plug-in is ready, you just have to confirm and the website is neatly on the new server or domain.
Needless to say, the server to which you upload the site has sufficient resources. Interruptions due to a very slow shared server can cause errors in the website, but this is rare. If you see any errors, try saving the theme options and the permalinks, this could correct the problems.
2. Move Wordpress website by hand
We prefer to use a good control panel such as Cpanel with: File manager, MySQL databases and myPHPadmin. It is nice that you can extract files uploaded on the server via the panel and that myPHPadmin is up-to-date. Some scornful hosting companies do not upgrade their myPHPadmin for years and with an old version of myPHPadmin errors quickly occur. If you cannot unpack, you must upload the website via FTP or use a script such as The Unzipper or a web-based FTP such as Net2FTP .
Let's start!
You can determine how you want to transfer the files from the server to your computer. I show here how they do this with Cpanel, my favorite way (Pleskpanel and Directadmin is almost the same). This in itself is a simple matter, so too much explanation is unnecessary. Select all files in the public_html (root folder) and click "Compress". Always compress to "ZIP" as shown in the second image below.
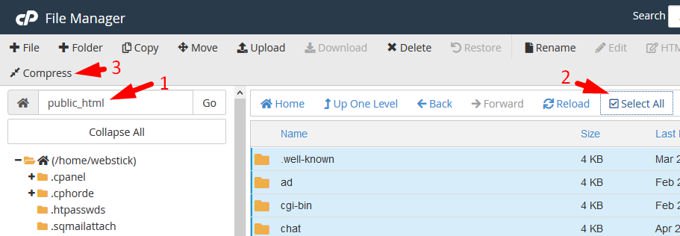

To see the compressed file, click "up one level" and open the public_html folder again. Select the file and click "Download".

The zip file will automatically get the name of the first folder in the public_html but for the sake of convenience I have called it "back-up.zip".
Download database with MyPHPadmin
Via your Cpanel go to "PhpMyAdmin", click on it and a new tab in your browser will open with this program.

Click on the database that you want to download and you will see the following screen below. Choose the fast export method and idling SQL, it is automatically on it if you do nothing (photo 2 below).
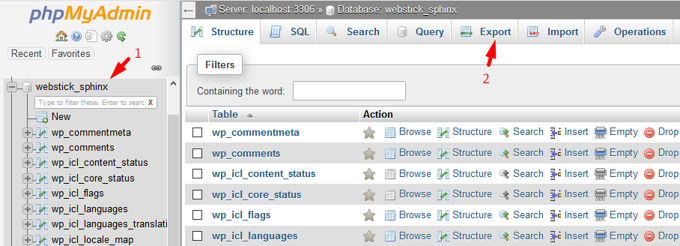
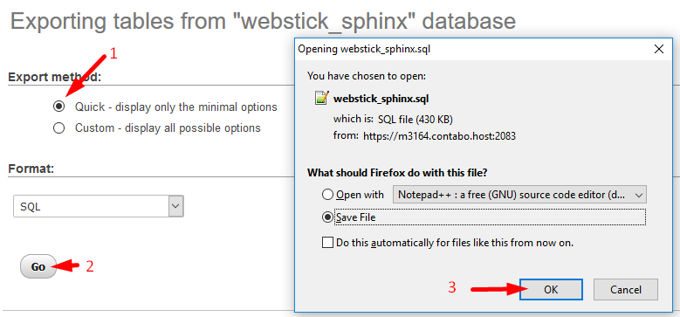
The database is now downloaded to your PC and we will edit it immediately, but first we will create an empty database on the new location/server in which we will import it.
Create a new empty database
Open MySQL Databases in your Cpanel. See image below.
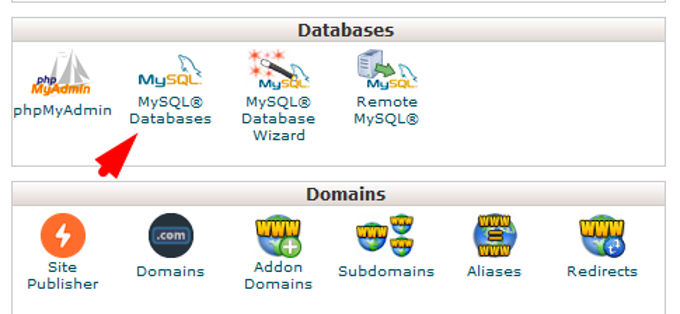
We then create a database, user, and give the user full rights over the database. The following 4 images show this.
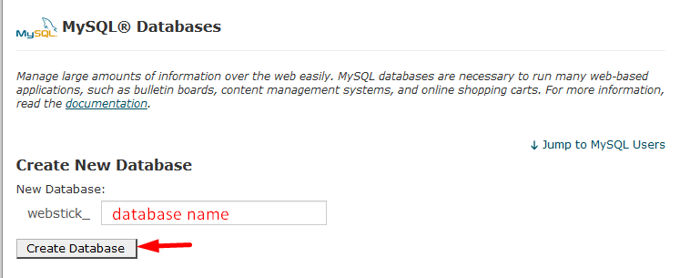
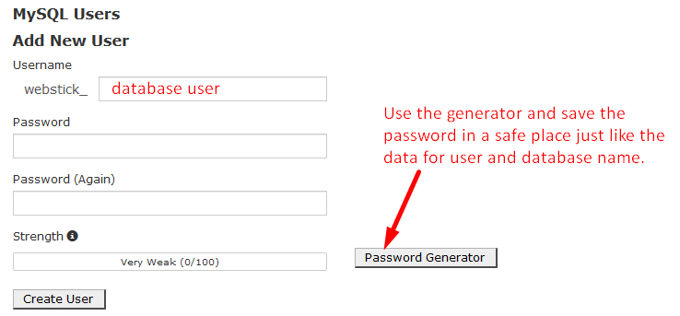

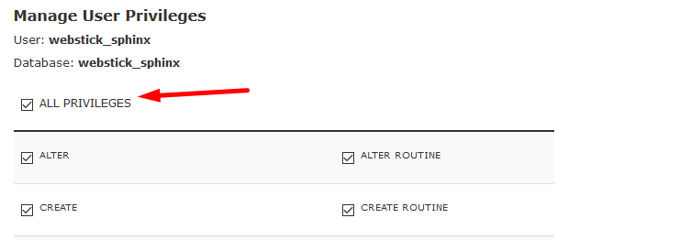
At the bottom you click on "Make changes". Okay, that's done. Leave MySQL databases.
Integrate database into the new empty database
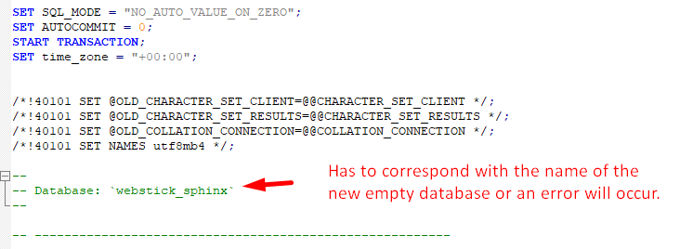
Before we can start with this, we must change the database name in the database that we have downloaded, otherwise it will not be accepted. Use a random text editor for this. The best is Notepad++. In case there are connection problems, you set a USE statement in the database at the top.
We now open PhpMyAdmin on the new server and click on the new empty database, just as described earlier in the export. Then click on "Import".
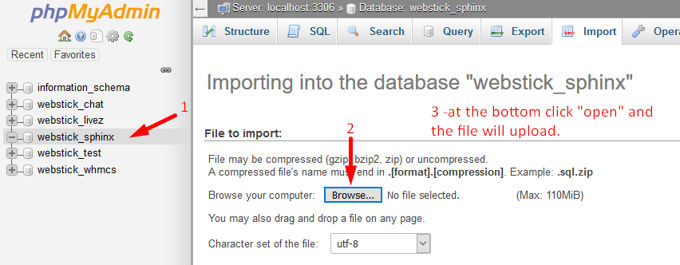
Then click on "Browse", search the database on your computer and click on "open" at the bottom.
Then click at the bottom on "Start" and wait for PhPmyAdmin to do its job. If everything went well it should look something like the image below.

All content has already been moved, we just have to make sure that all URLs are correct and the website will do what is currently not the case. In wp-config.php we have to use the database data of the new database and user. We adjust the 2 main URLs for front and back end via PhpMyAdmin, then we log in and install a plugin to adjust everything URLs so far that did not happen during the import. My favorite plug-in for this is Better Search Replace.
Edit wp-config.php file
In wp-config.php (in public_html), adjust the data for the database name, database user, password, and in some cases host. "Localhost" can generally just be used.

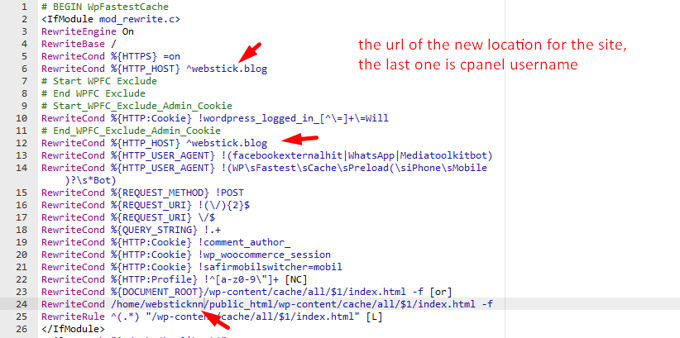
Check / edit URLs in .htaccess
This file handles many directs if you use cache, for example. In this file you have to check if all URLs are adapted to the new domain, if not you do this yourself manually. If you have only moved your domain to a new server, nothing can be changed, only if the site is moved to a different domain.
Make URLs correct with PhpMyAdmin
We adjust the URLs for "siteurl" and "home" in wp_options as shown below.

Further make URLs correct with Better Search Replace as mentioned earlier already
We now log in to www.websiteurl/wp-admin with user and password as it was on the old server, which has been copied to the new database. Install the Better Search Replace plug-in.

Save back-end
In the meantime, your website should work perfectly. Probably unnecessary, but if the website does not look exactly as it should, it is sometimes good to save "Settings >> Permalinks" and the theme options again. Also clear/empty all possible cache options in your browser.
Advertisement
